Yatse voice assistant integration (Google Home, Amazon Alexa)

We now provide a small paid plugin that allows extending Yatse powerful voice commands to voice assistants like Google Home or Amazon Alexa.
Play store link: Voice assistant integration plugin for Yatse
The voice engine currently support English, French, Spanish, Italian and German, you can contact support to help enhancing the support of those language (not all currenly supported languages have the same level of training and so quality) or help implementing new ones.
Likewise if some commands are missing or you expect different sentences to start a command, please contact support with details for implementation.
Unlike other solutions everything is simple and integrated as we do most of the work for you.
This solution is also very secure as it does not require you to expose Kodi to Internet or expose potentially unsecured server that you need to maintain.
We also provide the most advanced AI based natural voice command parser to improve command recognition without having to speak like a robot.
The only downsides are that the device hosting the plugin must be in range of your Media Center for the commands to be executed and the plugin is paid as we need to maintain servers and assume the associated costs.
Once installed and properly registered you can follow the procedure to integrate it with your voice assistant.
Please remember that the natural voice recognition is complex and require your help to improve by reporting errors and problems.
See reporting an issue or Community forum for how to contact support quickly and have everything improved fast.
The plugin requires a license (Free trial available), up to date Google Play Services, a Yatse license and at least Yatse 10.3.5.
When everything is working, you should only see OK in the status page.
This plugin needs to be able to receive commands at any time and may require you to change Android settings on some brands!
See: Don't kill my app for more information.

You can use the log button to check application logs and share them to support.
And you can use the settings part to disable analytics and crash reporting. Please remember that those are fully anonymous and help us improve the application.
The plugin can be integrated with anything that can call an URL with parameters and transform voice to text.
All you need to do is call the url (GET or POST) https://voice.yatse.tv/raw/DEVICEHASH/LANGUAGE/QUERY from your tool with the following parameters:
• DEVICEHASH: The device hash displayed by the Voice assistant plugin. Please note that this value is anonymous and changed each time you reinstall or clear application data.
• LANGUAGE: Supported language of the following query (Currently supported: en, fr, de, es, it)
• QUERY: The natural language query like "Watch the next simpsons episode"
If you have multiple Media Centers or renderers, you can POST a JSON body to that url with specific parameters to select the proper host and renderer. (All parameters are optional)
Example: {"host": 2, "rendererType": 6, "rendererId" : "abcdidofthechromecast"}. You can find the HostId in Yatse host configuration and rendererId in manage renderers.
You can get more details about the renderer selection at Yatse api page
Google Home integration is really easy thanks to IFTTT that not only permit the integration in a few clicks but allows you to choose any trigger word.
The configuration can be made from a browser and web interface of IFTTT.
Open IFTTT create, register a free account the follow the guide.There is currenly a bug in the IFTTT Android application that replace the url with a wrong one.
It is recommended to use the IFTTT web site.
If you use the application when you paste the url you need to remove the TextField that is shown then press Insert Ingredients, then TextField to workaround this.
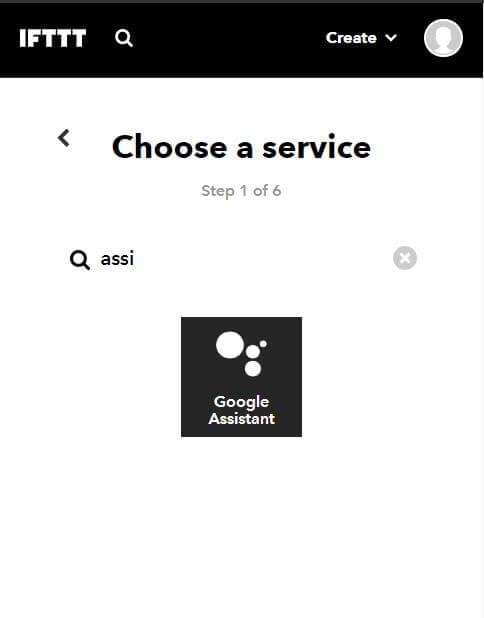
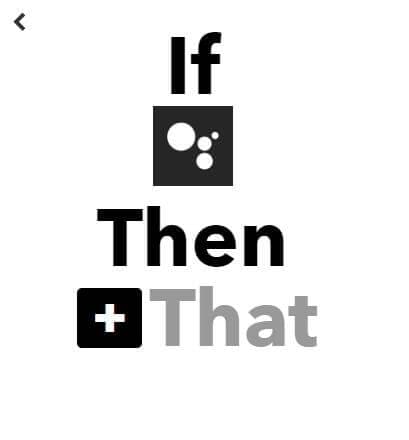
Click +This to connect IFTTT to your Google home
Search for assistant, click on Google Assistant and follow the link procedure.
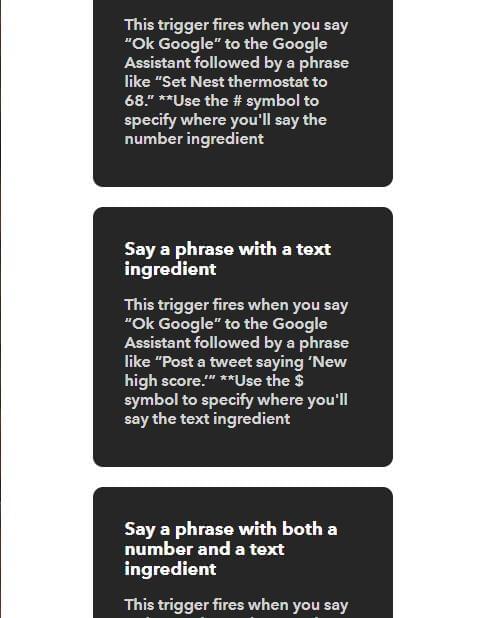
Select Say a phrase with a text ingredient
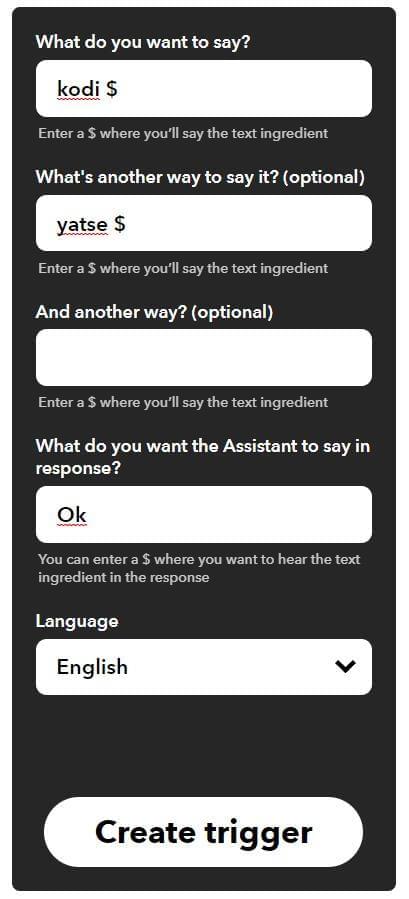
Fill the fields with the values that best fit your needs as per image example.
The voice commands must include the $ that will contain the actual command.
Click +That to connect IFTTT to your Yatse servers
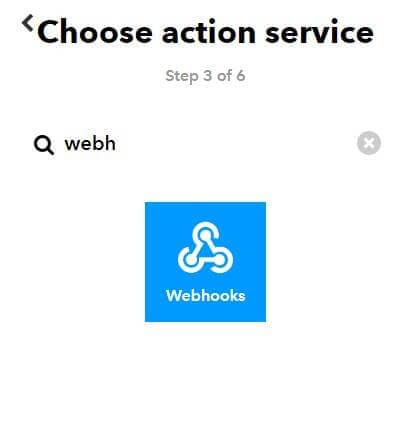
Search for webhook and select Webhooks
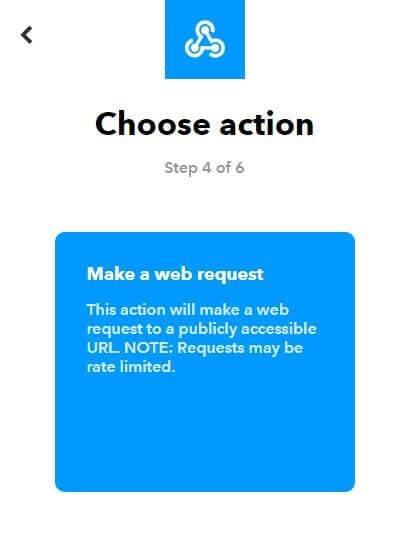
Select Make a web request
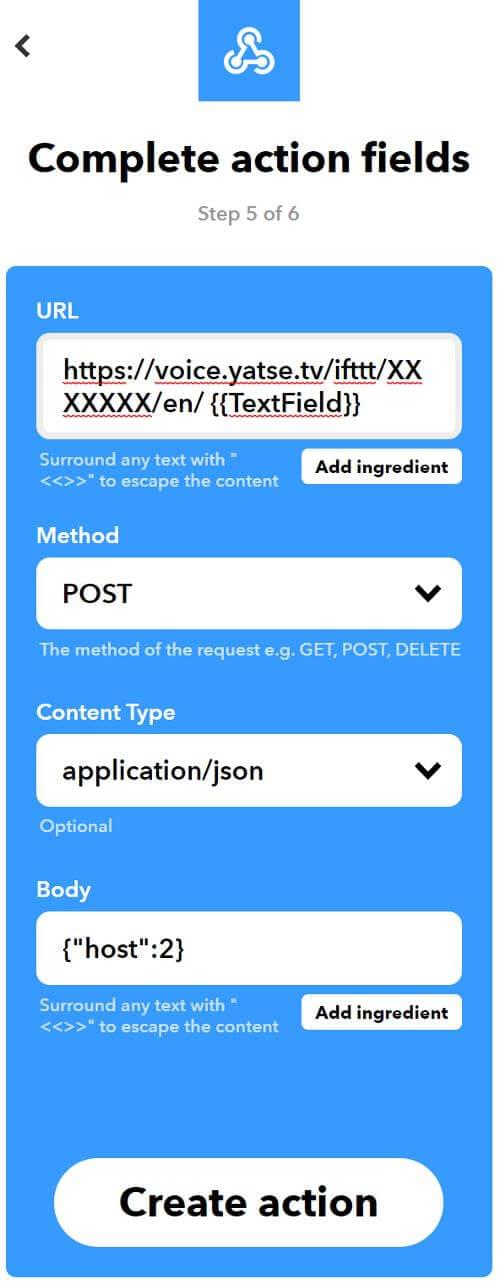
Fill the fields as per the following image.
The body part is optional and only required if you want to select a specific Media Center or renderer. (See manual integration for more details about it)
Example url: https://voice.yatse.tv/ifttt/XXXXXXXX/en/{{TextField}} (There's no space before the "{")
You can get the full url from the voice assistant plugin with a convenience copy button for easy paste.
The XXXXXXXX part is your Device Hash and en the supported language code.There is currenly a bug in the IFTTT Android application that replace the url with a wrong one.
It is recommended to use the IFTTT web site.
If you use the application when you paste the url you need to remove the TextField that is shown then press Insert Ingredients, then TextField to workaround this.
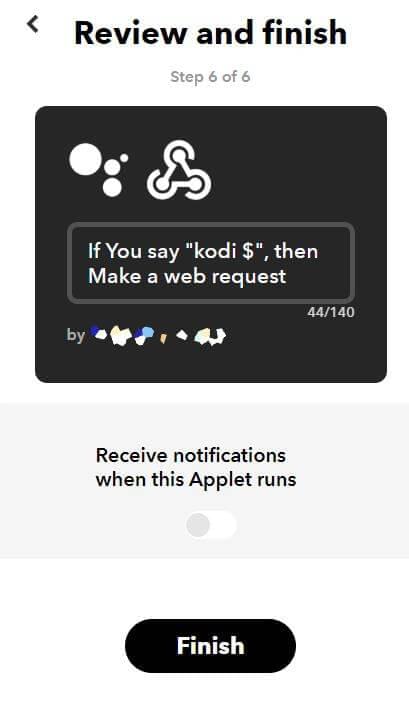
You're all done and you can send commands by saying "Ok Google Kodi play the last episode from the simpsons"You may want to uncheck the Receive notifications checkbox then click finish.
Alexa integration requires a few more manual steps as IFTTT integration does not allows text ingredients and invocation require more words.
The process will require you to create a free Amazon developper account and manual creation of a Skill, but it's a simple and fast processus if you follow this documentation.
If you have troubles you can get quick help at Yatse community forum.
If there's enough interest in this, more features like audio streaming or more direct skill may be worked on. Please show your interest in the forums.
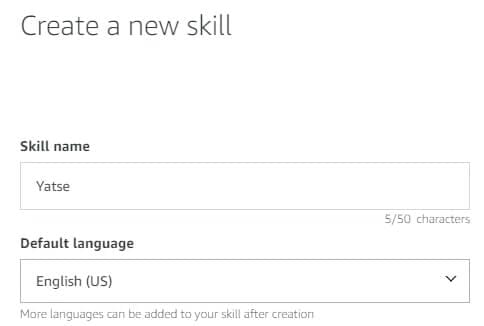
First you need to create a free developper account at: Amazon, click Alexa and log in with the account that you use on your Amazon devices.
Once your account is finalized you can create the skill that will connect Alexa to Yatse by using this link Create skill then select Create Skill
Enter a name for the skill (This name have no impact on the trigger words).
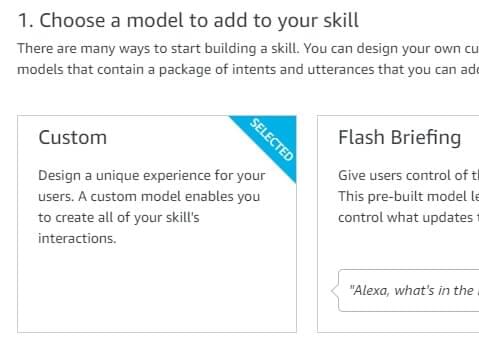
Then select your Amazon Alexa language. (If you choose the wrong language the skill won't work, but you can add other language easily after)
Select Custom as the model type
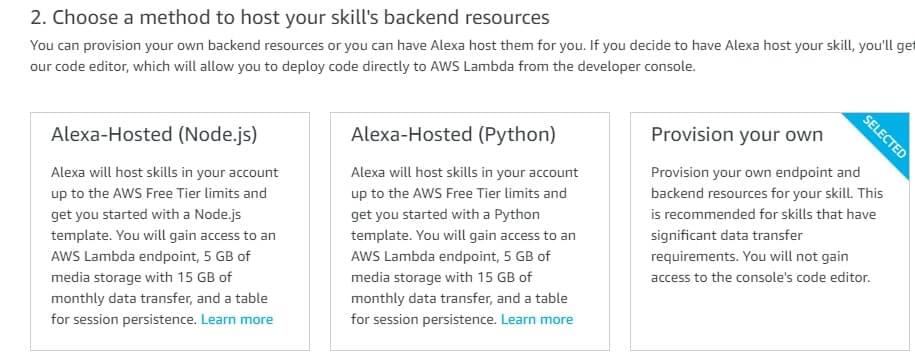
Select Provision your own as the method to host the skill backend resources
Select Create skill button at the top
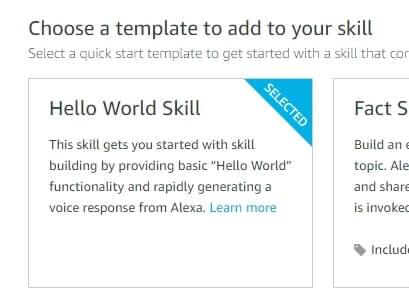
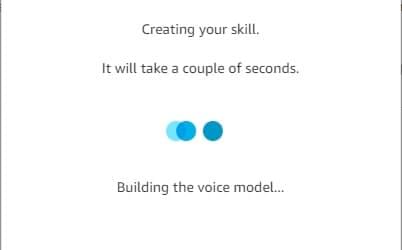
Select Hello World Skill as the template, then wait for the creation of the skill
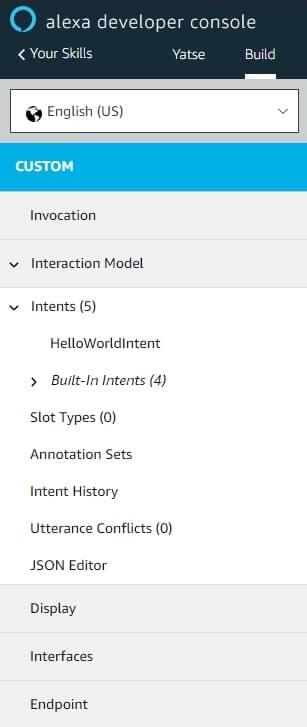
Select Invocation in the left menu
Then enter the skill invocation name. (For example: kodi remote) This will be the trigger phrase and unfortunately it requires to be at least 2 words.
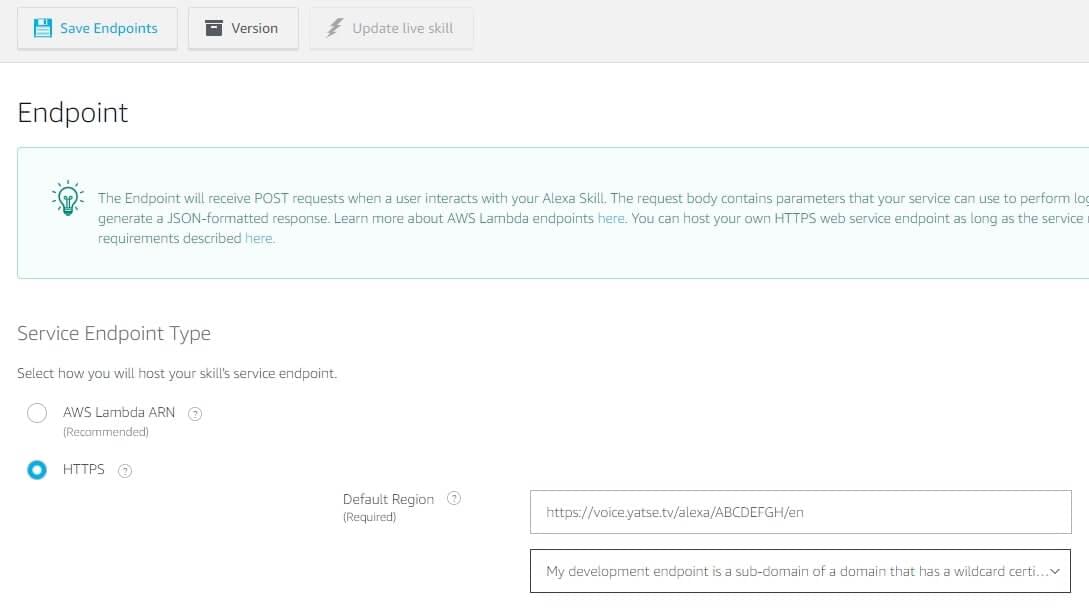
Select Endpoint in the left menu
Choose HTTPS as the type, and My development endpoint is a sub-domain of a domain that has a wildcard certificate
Use the Alexa endpoing URL visible in the plugin as the endpoint URL. You can add parameters to that url to select a specific host and/or renderer in Yatse, supported parameters are host, rendererId and rendererType.
For example a complete url would be:https://voice.yatse.tv/alexa/DEVICEHASH/en?host=1&rendererType=6&rendererId=abdcdidofchromecast.
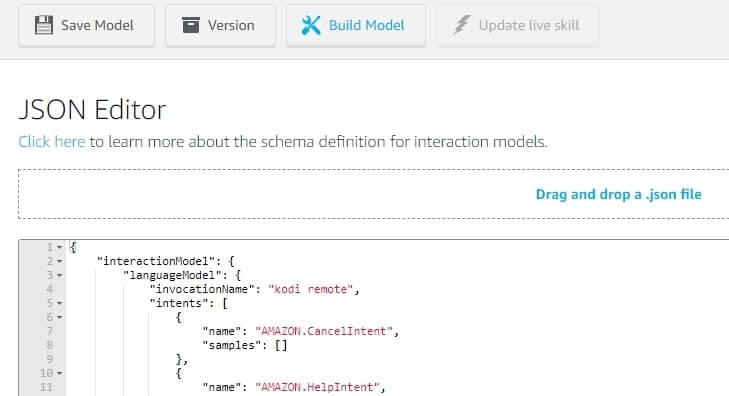
Select JSON Editor in the left menu
Copy and paste the content from JSON Skill
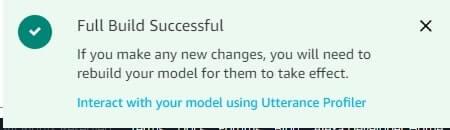
Click Save Model then Build Model and wait for completion
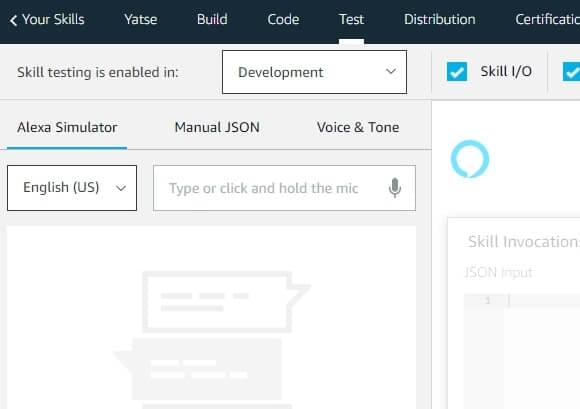
The skill is now ready, select the Test tab to enable it and test it
Change the Skill testing is enabled in:to Development
You can now test your skill either on your real device or on this tab by saying ask kodi remote execute XXXX with XXXX being the actual command like play some music.
The skill also support fallback so ask kodi remote play some music should work most of the time unless Alexa decide to call another completely unrelated skill. So test and see if the short version works well on your device.
If everything works, you should get a Command Sent answer.
You can change the invocation name or the starting sentences at any time in the skill editor, you just need to remember to click on Save Model then Build Model for the changes to be applied and to not change the slot names.
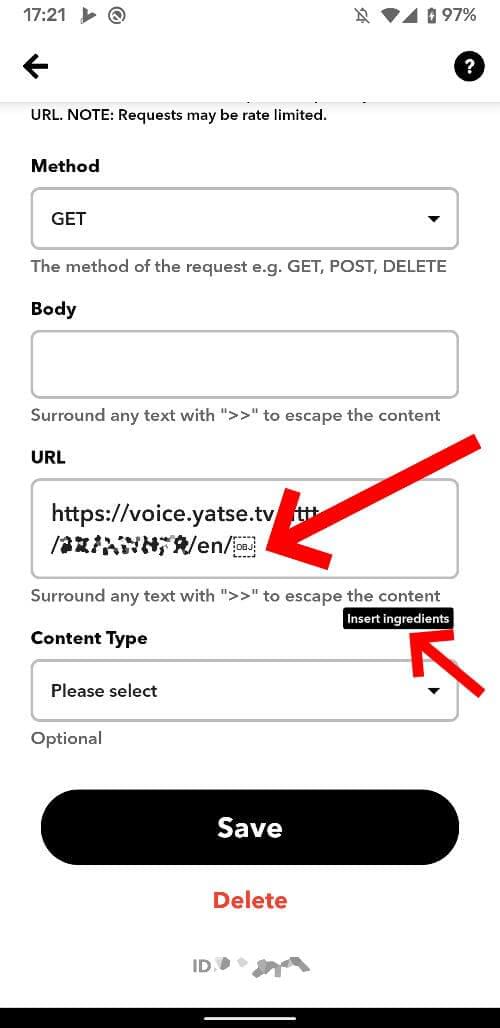
If you see [OBJ] in the IFTTT application then you did not read the warnings :)
You need to remove that symbol then press the Insert ingredients button and select TextField to add the proper value in the url.
If you have any problem or do not understand this documentation then please contact support with details and Debug logs.