How to configure Kodi for Remote Control access
You need to configure Kodi to allow Yatse to remote control it.
Just select your Kodi version below to see the steps.
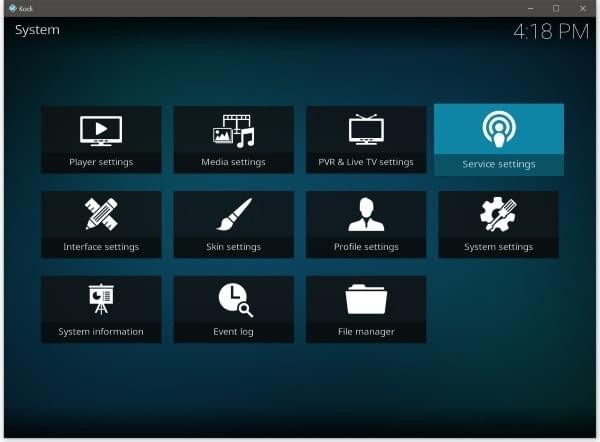
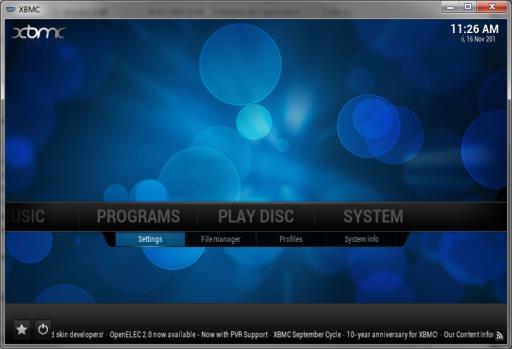
From the home screen of Kodi select Settings

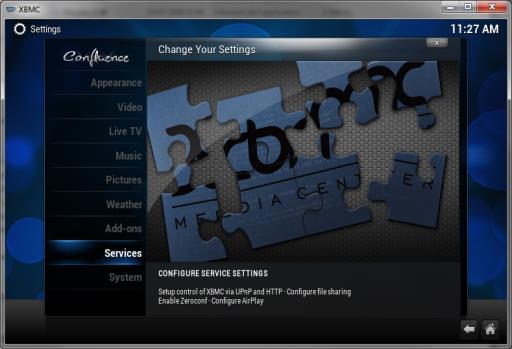
Go to Service settings
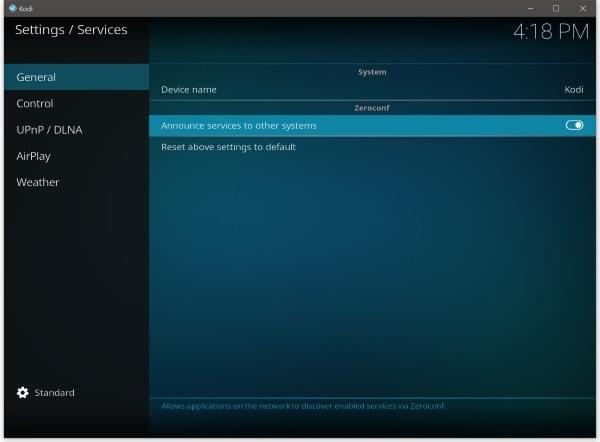
Activate Announce services to other systems
Remarks:
• On Windows platform you need to have Apple Bonjour installed. (Comes bundled with iTunes or with this tool). Required by Kodi not Yatse.
• This part is only needed for auto discovery, you can still use manual configuration.
• On Android this option may missing as broken and removed by Kodi team. You can still do manual configuration, there's no impact on Yatse usage.
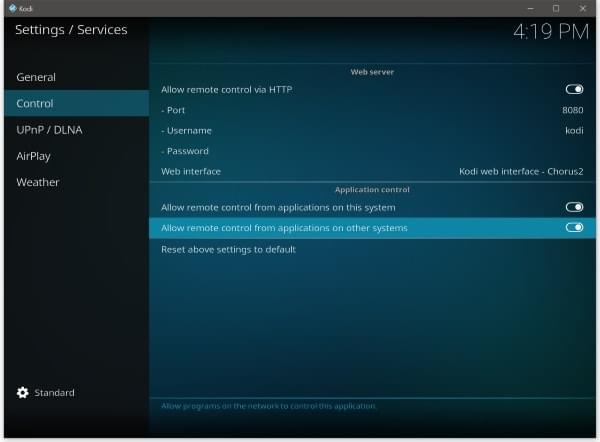
Go to Control menu
Activate the options:
• Allow remote control via HTTP
• Allow remote control from applications on this system
• Allow remote control from applications on other systems.
Please keep in mind that the HTTP server of Kodi is not really secure so you must ensure that the Kodi machine is not accessible from Internet or untrusted computers. You should set a Username and a Password to secure the connection.
• Starting with Kodi 19 (Matrix), if you really want to use Kodi without a password you need to disable the require authentication option.
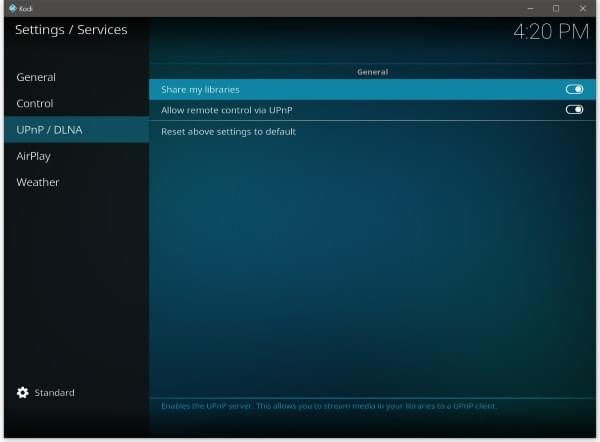
Go to UPnp / DLNA menu
Activate the options:
• Share my libraries (Needed for some streaming cases)
• Allow remote control via UPnP (Needed to stream between Kodi instances)
From the home screen of Kodi select System/Settings
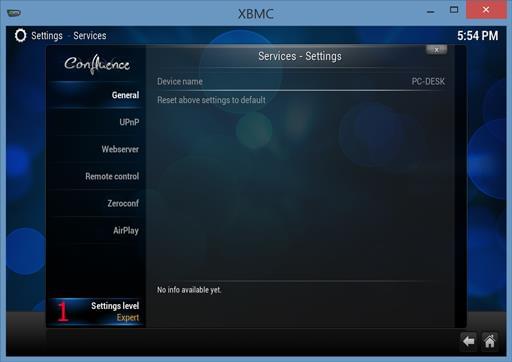
Go to Service menu
Activate Expert mode
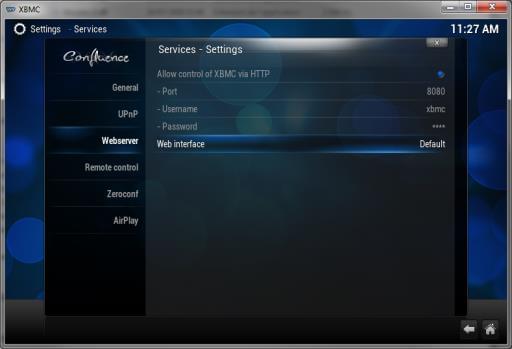
Go to Webserver menu
Activate the option:
• Allow remote control via HTTP
Please keep in mind that the HTTP server of Kodi is not really secure so you must ensure that the Kodi machine is not accessible from Internet or untrusted computers. You should set a Username and a Password to secure the connection.
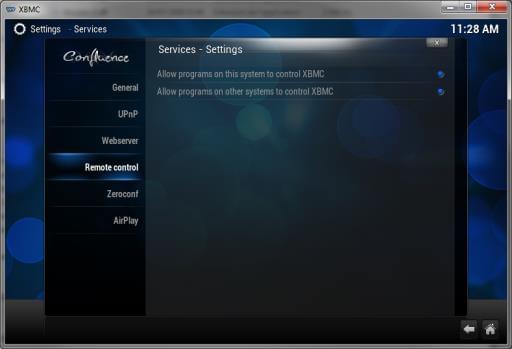
Go to Remote control menu
Activate the option:
• Allow programs on other systems to control Kodi
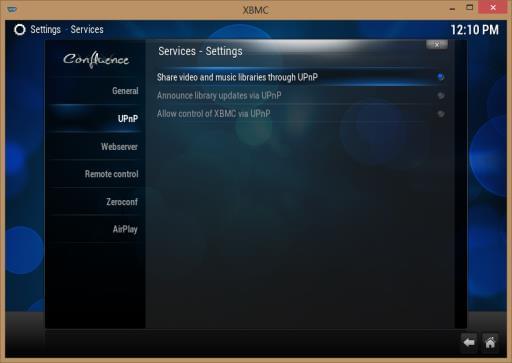
Go to UPnp menu
Activate the options:
• Share video and music libraries through UPnP (Needed for some streaming cases)
• Allow remote control via UPnP (Needed to stream between Kodi instances)
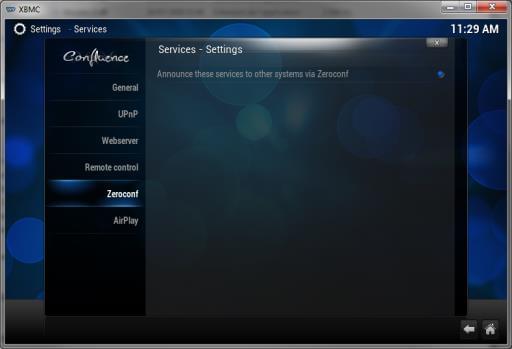
Go to Zeroconf menu
Activate Announce these services to other systems via Zeronconf
Remarks:
• On Windows platform you need to have Apple Bonjour installed. (Comes bundled with iTunes or with this tool). Required by Kodi not Yatse.
• This part is only needed for auto discovery, you can still use manual configuration.
If you followed all the steps and still have errors see: Troubleshooting Yatse Wizard
Remarks:
• The steps shows the default Kodi skin, if the skin you use does not contains all those settings you might want to revert to the default one for the time of the configuration.
• It is possible that some software on your computer use the same port that Kodi want to use, in this case just change the Port in the Webserver part to something else like 8888 or any unused value.
• If you use Skype on Windows 10, do not use port 80 as it's used but it will not trigger errors on Kodi.
• Auto-detection of hosts requires Multicast. Some routers does not support this or will block them by default. This will block Yatse auto-detection, just continue with manual setup.
• By default, on Windows hosts, Zeroconf is not enabled and require external software to be installed on Kodi host. (Kodi requirement). Manual setup will always work.
• If you do not have Zeroconf working then Yatse have no way to find your host automatically, this means that if it's IP changes, you need to reconfigure Yatse, to address this, we recommend that you use static IP for your host. You can also use DHCP reservation or DNS names, if your network support those.
• If you use a special Event Server port (Different than 9777 and configured via advancedsettings.xml) then you need to long press the Add host button to bypass the Event Server test. You can then edit the host to configure your special port.